One can see parts 1,2,4 and 5 of this discourse here, here, here and here.
This is the biggie. Pretty much every home made version of a game requires a board, so even though you may be building something completely different I am sure that this entry is of interest to you. As I said in the comments to part one the board was the thing I was most nervous about, as I wasn't sure how I was going to do it. There are a lot of ways to do this, and I know that mine wasn't the best so here are the options in increasing order of cost. You will probably need a surface to attach to of some kind. The best is an old game board from an unwanted game of the right size, and while you can just use cardboard it looks cheap and is best avoided.
1) Print out on multiple sheets of standard paper and glue to board. This is OK and if done really well will work, but there is no doubt it will look cheap and may detract from the play experience.
2) Print out on multiple sticker labels and attach to board. With a finishing gloss spray this isn't bad, and is probably the best option if you can find appropriate size sticker labels for your board. I would have chosen this option, but the only sticker labels I could find were 8 x 11" and my board was in four 10" by 10" segments.
3) Print out as one big sheet then (cut up and) glue to board. A finishing spray may be required. This is what I went with so discussion later.
4) Print out as one big sheet then laminate it. This is nearly a really good option as you can pretty much guarantee the quality will be good enough, but it does leave you with the problem of a game board that doesn't fit in a box and either needs to be stored flat or rolled up.
5) Print out as one big sheet on a giant sticker label then attach to your board. This really depends on finding a place that can do the printing for you, but this will probably guarantee the best results.
6) Get the whole thing professionally done. BoardGameDesign.com will do the board for you for US$64 plus shipping. Pricey and I have no idea of the quality.
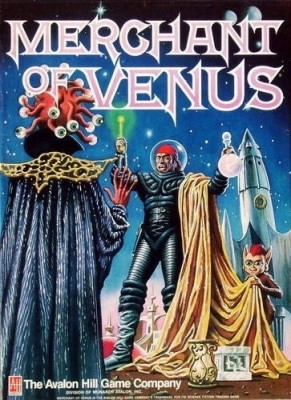
 As I stated I went with option 3 as I thought it would be the easiest to achieve while giving a good result. I found an old copy of Trivial Pursuit with a quad-fold 20" by 20" board, and found on Artscow that I could get a 20" by 24" poster made for me shipped for US$20 (file here for those interested), which I went for as I could guarantee the size would be perfect, and printing the same thing at a shop here without a gloss finish was about AU$25 (Walmart apparently does it for US$16) .
Upon receiving my poster it was perfect. A great gloss finish so didn't need any spray finish and when placed on the game board was the perfect size. I had to trim it to size and cut into four segments. Measuring my cuts repeatedly to make them exact paid off, and I managed to get the pieces square and they all looked perfect on a trial fit on the board. I used some spray glue on both the board and the poster waited until they were tacky and then very carefully stuck them on, making sure they were in alignment and that there were no bubbles. It looked good. No, it looked damn good. I was really impressed with how it turned out, as almost everyone would think this was professionally made. I called my wife to show her (she didn't care) and then went inside leaving the board outside to dry and started plotting my next projects, as if it was this easy to get a high quality game board then the sky was the limit.
3 hours later I went out to bring the board inside and was shocked. Bubbles had appeared everywhere on 3 of the four segments. I don't know if this was caused by an uneven spread of glue, a reaction of the poster to the glue, or some propellant left in the glue expanding. I repeatedly tried to get rid of the bubbles by smoothing them to the edges and pulling up the pieces and relaying them flat, and I didn't succeed. The board is in better shape than it was but there are still a couple of small wrinkles and bubbles and I lost my perfect alignment of the 4 pieces. The fourth section that had survived this process proceeded to bubble a day later, so there was obviously something unavoidable about it in my process. It is not too bad, but the fourth board which wrinkled and bubbled later has a few prominent ones.

Now I am left with a slightly wrinkly game board that is definitely serviceable but not ideal (my wife who has very low standards for home craft projects told me I am just a perfectionist and to stop caring). The wrinkles won't affect game play at all, and do leave it looking more like a home-made copy and not the semi-professional one I was hoping for. I probably only care so much because I saw it in a better state and saw how good it could look. If I find that we are playing MoV a lot and it really bugs me I will probably remake it someday.
Thus to conclude, what advice do I have for making a game board? The only one I do have is to avoid glue if at all possible (in the same way that I would say to avoid scissors if at all possible). Glue is really problematic in that it is near impossible to get right. It will be an uneven coating and it is very difficult to get the amount right, too little and you won't get a good bond, too much and things will start to warp. Sticker sheets avoid this problem and are much better to use, but getting them done in the right size can also be an issue and the finish won't be as good quality even with a colour laser printer. Getting one big print and laminating it will give you a guaranteed decent quality result, but then you hit storage issues. I don't think that there is a good way of doing this cheaply with results that look professional, otherwise we would all be improving our games with great new boards.
 Games
Games How to resolve AdBlock issue?